Page 2 of 3
Re: Yet another endless build for me. This time on the Caprice.
Posted: Wed Jan 02, 2019 7:58 pm
by CrashTestDummy
FYI, the 'ball socket' for the exhaust end on the Solo Performance high-flow cats are not accurately-made. While our X-Force exhaust had been modified by the PO so that it fit the factory cats, the driver's side on our car didn't snug up to the cat-side flange as the passenger side did. 2+ HOURS with a die grinder got it so that it fit better. The OD of the ball on the driver's side cat was 0.2" larger than the fitting on the X-Force head pipe. I finally got it fitted and bolted up, but was out of time and energy to finish the exhaust install.
Story continued......
Re: Yet another endless build for me. This time on the Caprice.
Posted: Sat Jan 05, 2019 6:12 pm
by CrashTestDummy
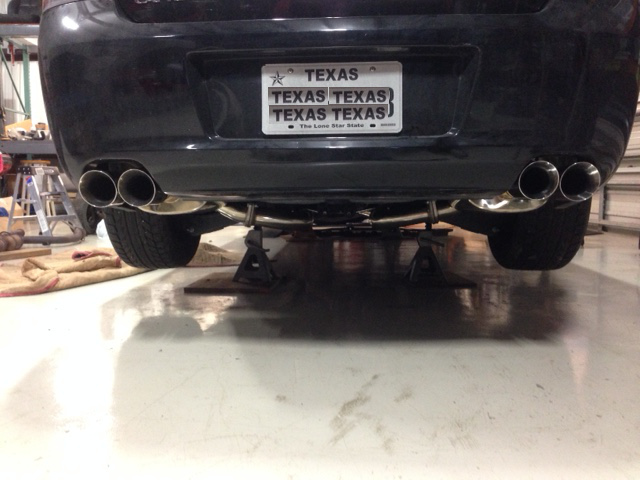
We finally got the exhaust fitted and buttoned up. There's about 1/4" of leeway down the entire path, with maybe 1/8" for the tail pipes. What a PITA, but it's in. Started the car, and it sounds pretty nice. I bit loud, but I'm not sure where the internal valves are set.
I CAN'T FIND THE REMOTE CONTROL!!!!!!!!
We turned the shop upside down trying to locate the thing, a couple of times. The damned thing is AWOL. I'm not finding a spot to order a replacement from X-Force, so I've emailed them to see what can be done. If push comes to shove, I"ll just jump each muffler separately to get to the desired setting and leave it at that. We'll see what they say.
Re: Yet another endless build for me. This time on the Caprice.
Posted: Sun Jan 06, 2019 4:58 pm
by CrashTestDummy
After finishing up the exhaust install, we did take this picture:
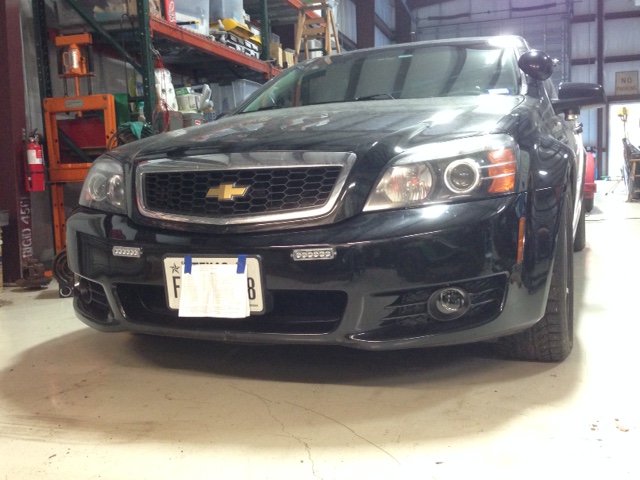
I also got the LED driving lights wired and the harness wrapped in conduit:

Note that the back of the front bumper cover is upside down in this picture, and the conduit is routed to the passenger side of the cover. I still need to terminate those wires, but this is good for now.
Re: Yet another endless build for me. This time on the Caprice.
Posted: Sun Jan 06, 2019 7:56 pm
by lastcall190
Both items look good, nice and tidy. Post a pic of the front bumper and lights when that project is 100%, as I'm interested to see what you came up with.
Are those 3.5" tips? Fill out the bumper opening quite nicely.
-J
Re: Yet another endless build for me. This time on the Caprice.
Posted: Sun Jan 06, 2019 9:14 pm
by CrashTestDummy
Not sure what the tips are. The exhaust is 3" cat to tail pipe, though.
Yeah, front pic is pending. Still waiting for the fog lights to arrive.
Re: Yet another endless build for me. This time on the Caprice.
Posted: Wed Jan 09, 2019 5:21 pm
by CrashTestDummy
Well, my order arrived today. I ordered:
1 ea. front under tray - the one on the car is cracked in places, so I figured I'd replace it while parts are still available.
2 ea. 'outer reinforcements - one for each side. That way I get those capture nuts.
2 ea. fog light assemblies, one for each side.
I got:
1 ea. front under tray
1 ea. outer reinforcement
1 ea. fog light assembly
FML!!

Also, the replacement X-Force controller and remotes is still on a truck. The delivery guy claimed he couldn't access the property. Funny, the same company delivered other parts to my house on Monday!!!
I'm going outside now to see if there's a break lurking around here I can catch!
Re: Yet another endless build for me. This time on the Caprice.
Posted: Thu Jan 10, 2019 12:34 pm
by CrashTestDummy
The Varex controller and remotes were delivered this morning. Still waiting for the fog lights and reinforcement bracket.
Re: Yet another endless build for me. This time on the Caprice.
Posted: Sat Jan 12, 2019 5:55 pm
by CrashTestDummy
The controller works GREAT! The remote is already on the key chain, so no losing that booger!
The replacement fog light and reinforcement panel arrived, too. Thank you gmpartscenter.net!!
The lights are installed, but I need to find the notes on the wiring kit so I know what to plug in where. It looks like the kit allows one to tap into the side marker light for power? signal? Either way, I'm not sure I can do that, since it looks like someone chewed (yes chewed) the body side connector for the front side marker light harness off. I'll investigate more tomorrow after I get the install notes. I think I'm using a Steve Walker kit.

Re: Yet another endless build for me. This time on the Caprice.
Posted: Sun Jan 13, 2019 5:39 pm
by CrashTestDummy
Got some quality time out in the shop today, and got most of the wiring completed for the fog light install when I hit a snag. I've posted my queries to the 'how to install fog lights on a Caprice' thread, so hopefully Steve, or someone who's done this job will reply. Overall, Steve's instructions have been spot-on!
On another note, I discovered the Varex valves seem to be pretty much one setting, or the other. You can get open, or closed with the remote, but fine-tuning it to get something in between is going to be very tricky. I was hoping to be able to tune out drone, if I experienced it, but that might be just wishful thinking. We'll see once we get the car back on it's feet and on the road.
Re: Yet another endless build for me. This time on the Caprice.
Posted: Sun Jan 20, 2019 6:35 pm
by CrashTestDummy
FINALLY, we're on the ground again!! A project I started New Year's weekend, we finally had time to almost finish up. I still need to run the wiring to the cabin and install the headlight and LED switches, but we're at least drivable now.
I found out why the front corner light harness wasn't connected, it was a real bitch to reconnect! I ended up having to pull the cover again, and then set it on an elevated pad so I could work on the connector. I finally got it inserted enough to light the corner lights, and then used a slip-joint pliers to coerce the connector to lock into place. I then fished the LED light harness up into the engine bay, and secured it.
Can't wait to get out and actually see how the exhaust is on the road. The yard is a swamp right now, so we'll probably wait until at least next weekend before attempting a vehicle swap.
Anyway, here's the front of the car after everything was buttoned up:
I also took some time to sweep some of the mud out of the shop from the last couple of vehicle moves.